Webform: Basics
UCT Drupal WebCMS Webform basics. Creating a form, adding elements and setup of email handlers.
Navigate to the Forms dashboard via the website's dashboard.
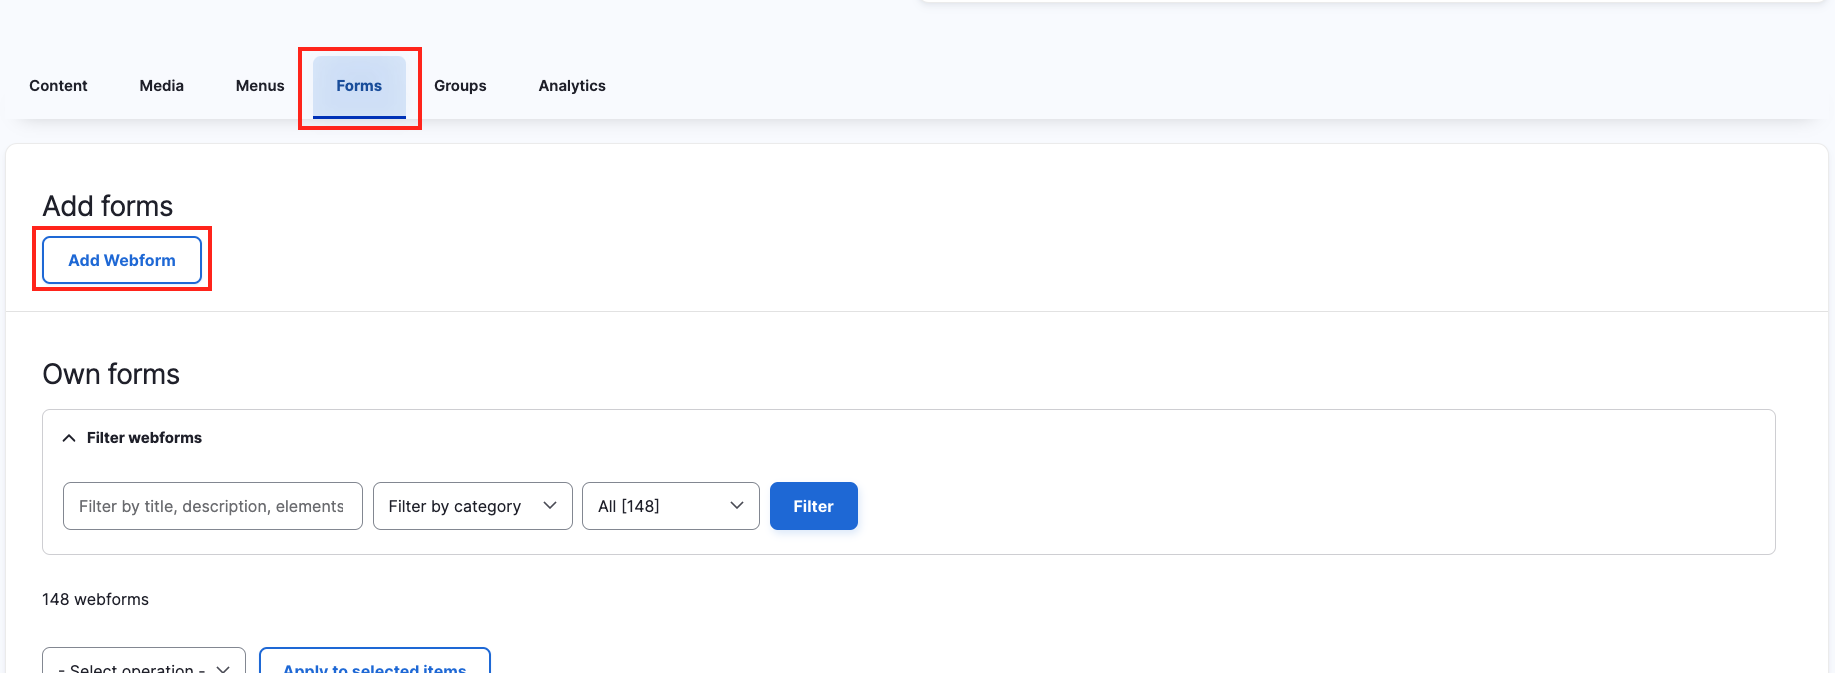
Add a new Webform by clicking "Add Webform" button.
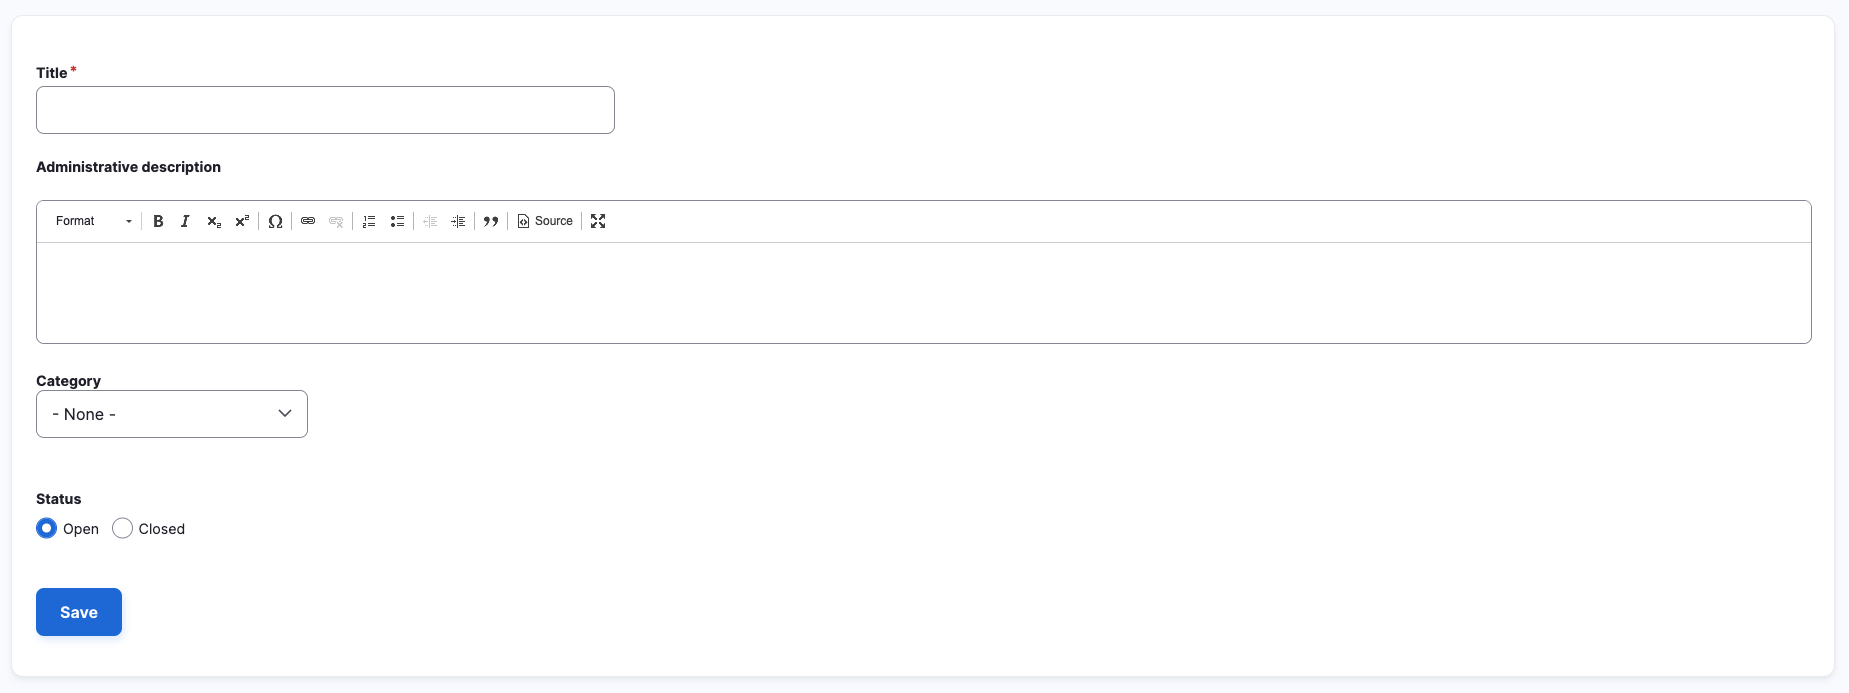
It is required to give your Webform a title. Make the title descriptive if you are not adding a description, for example include the Faculty/Department/Unit/Organisation/Society name or the name of website it will be used on/for. e.g. HR contact us form, Faculty of Health Sciences Annual Open Lecture 2023 registration.
Click Save, once complete to finalize your Webform creation(these settings can be changed later on).
On the Form dashboard, find the Own forms section to view the list of Webforms you've created or have access to.

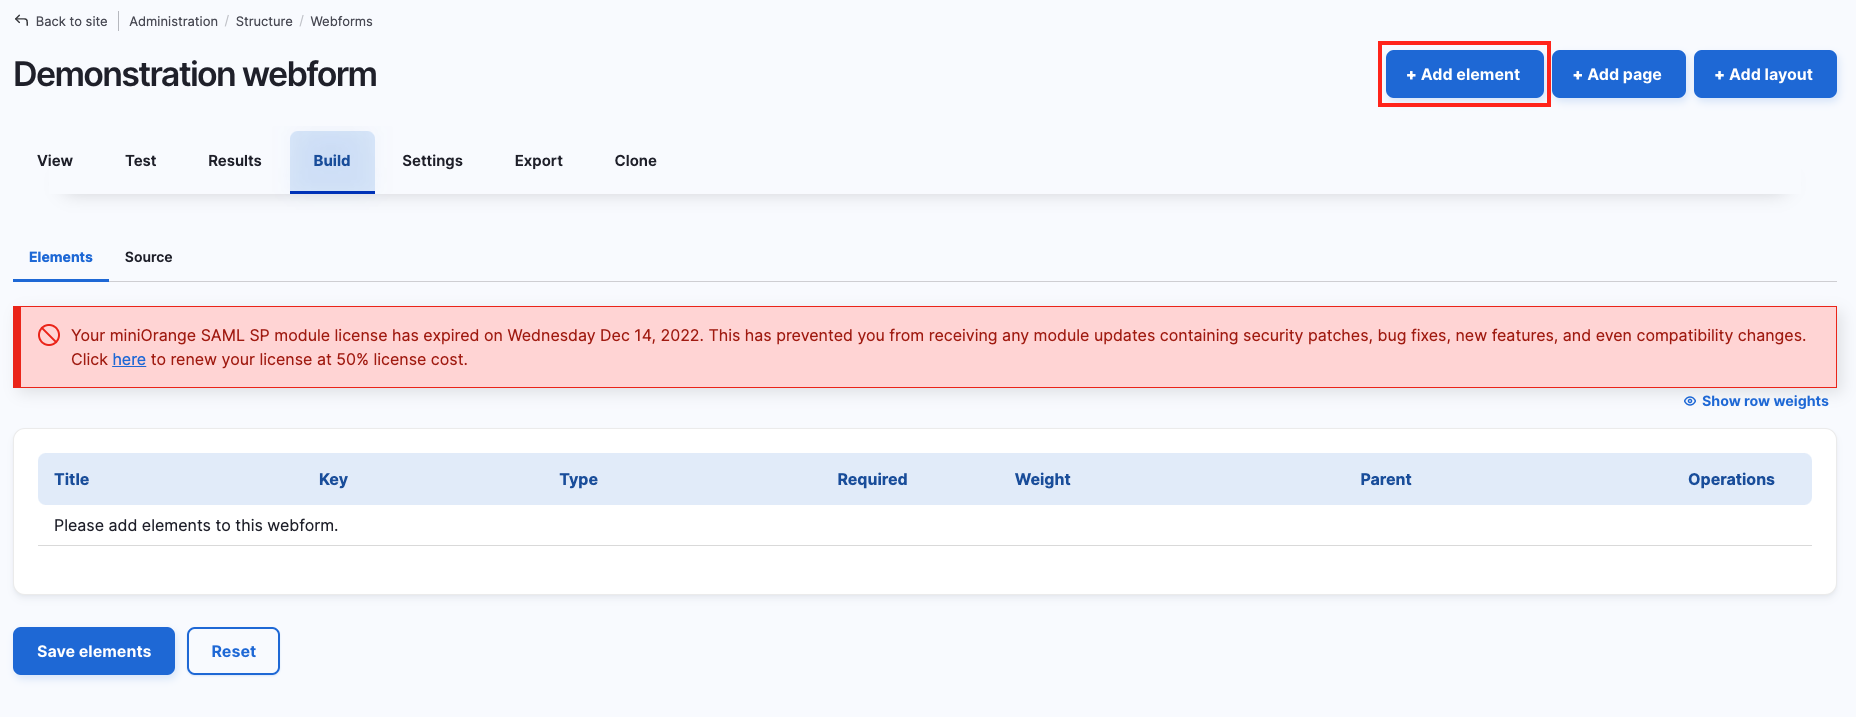
Find the specific Webform and click Build to editing the Webform's elements.

The basic building blocks of a Webform are elements. Elements are the fields the end user fills in, like text fields, email address and file upload fields, they are the form's fields.
Let's walk through adding some elements to create a simple form with Name, Last name, Email address, Textarea (comments) and a File element to upload a file.
Click the Add element button at the top of the Webform build page to add an element.
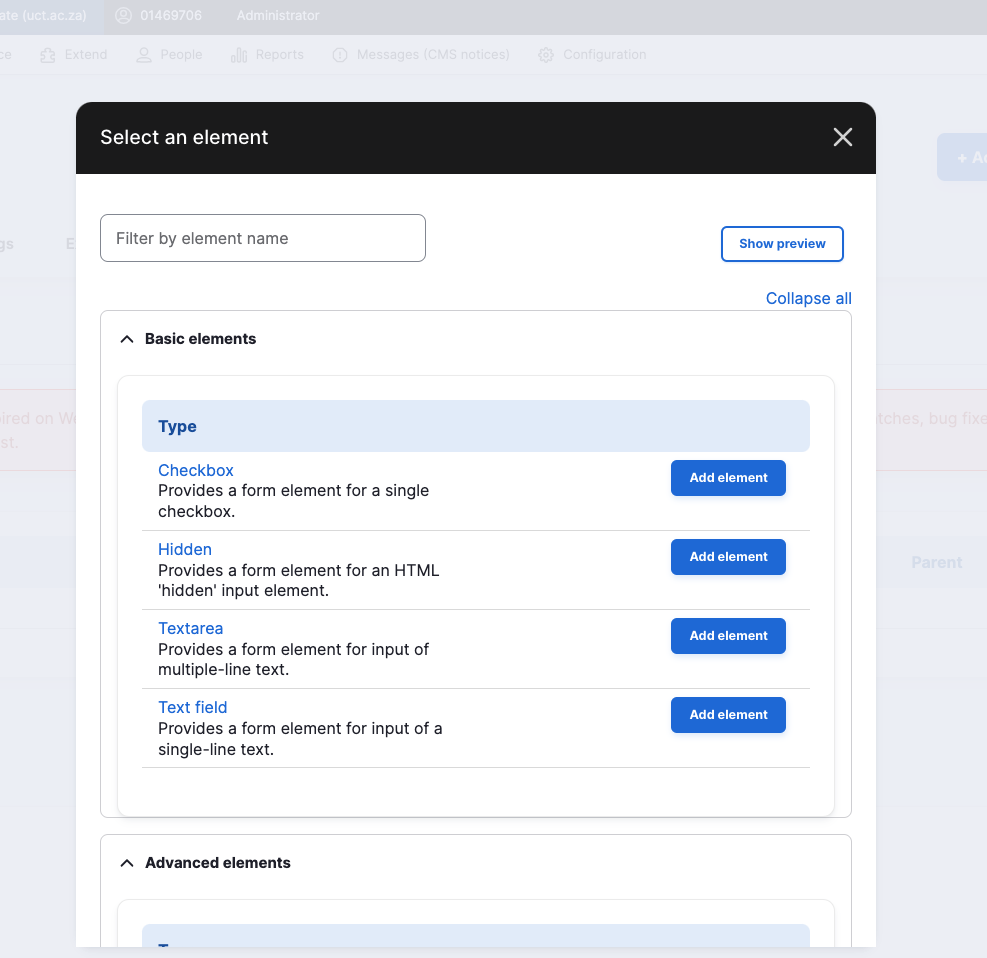
Find the Text field element within the list of elements that appear (scroll to reveal more elements or filter by element name) and click Add element button
Before the element can get added a few options on the element need to set: Title (mandatory), this is the element's label.
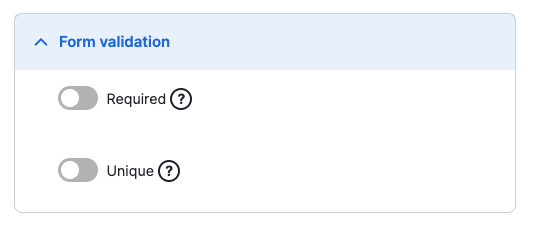
If the field needs to be required, enable this on the element under Form validation(bottom of section), for the demonstration I will enable it.
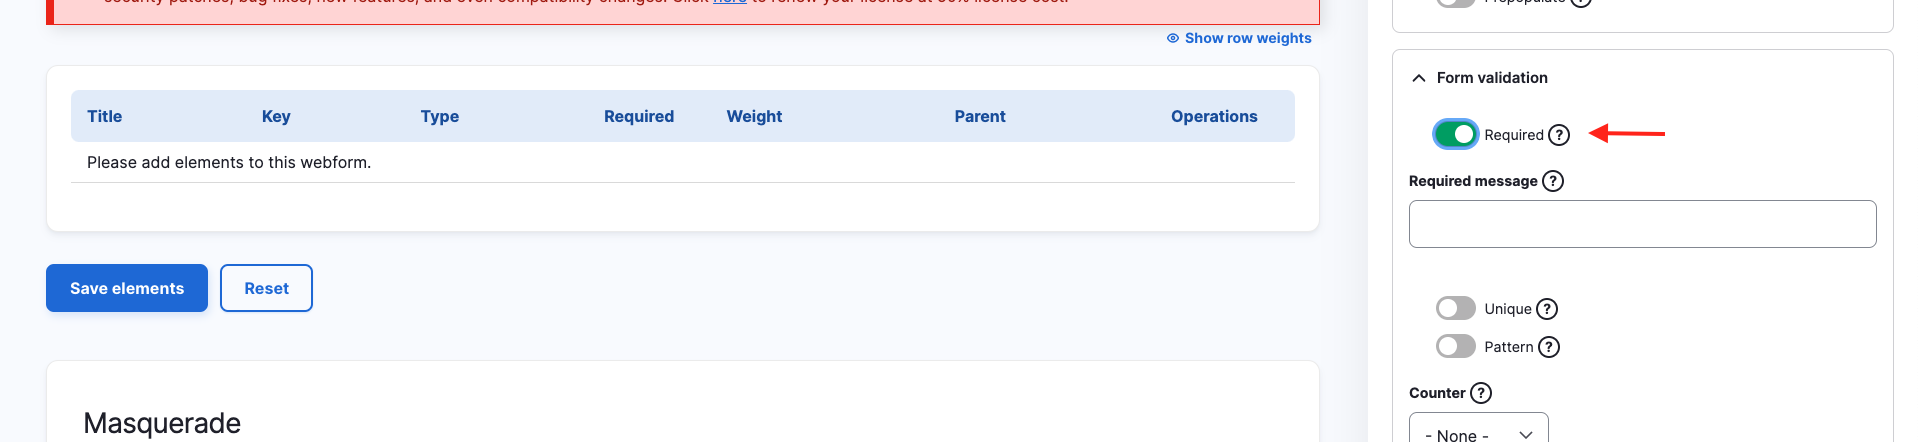
Then click the Save button to save the changes and add the element.
Duplicating an element.: Since the "Name" element is a text field and "Last name" will be one as well, we can duplicate it and edit the Title to "Last name".

Set the Title to "Last name" and click Save.

Now we'll added an Email element and Textarea element, and set both to required.
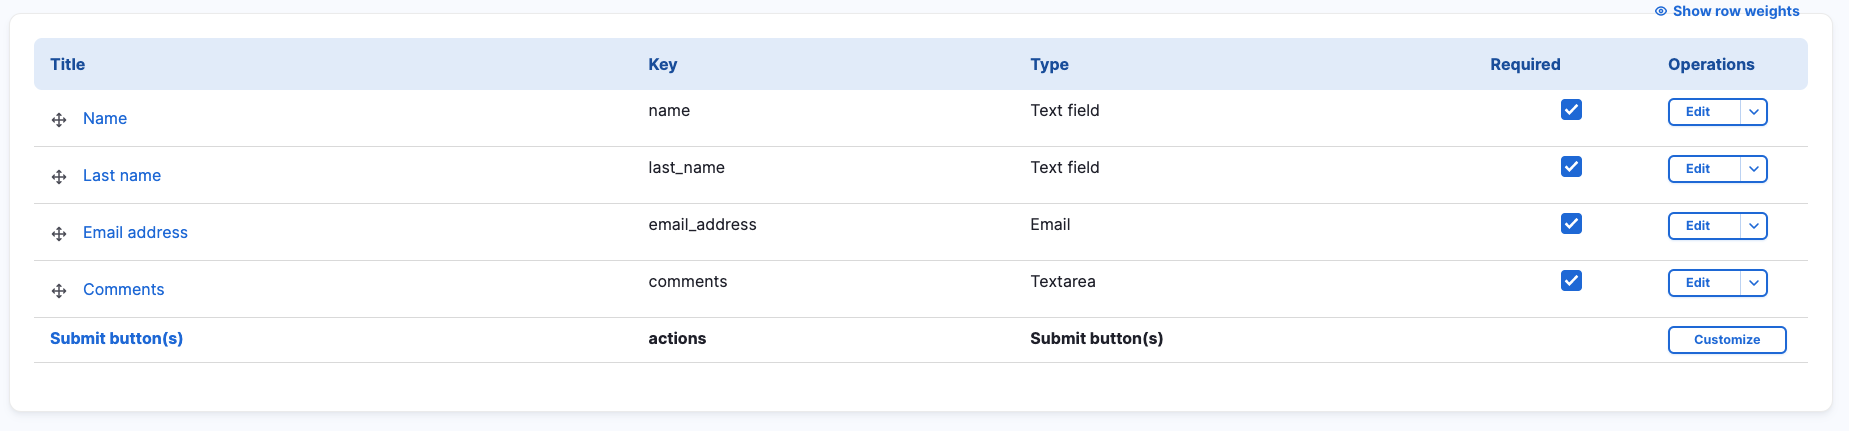
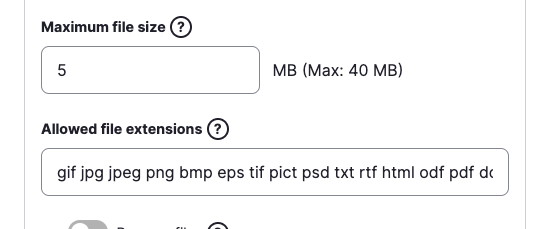
Lasting we'll added the File element, titling it "Document", so users can upload a file. We'll set the maximum file size allowed to 5mb and not set it as required.
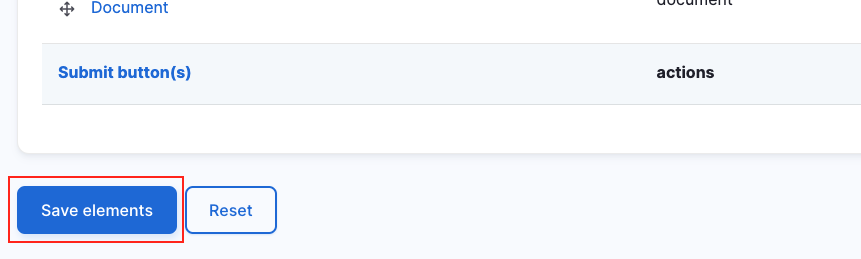
Save all changes to the Webform's elements, by clicking the Save elements.
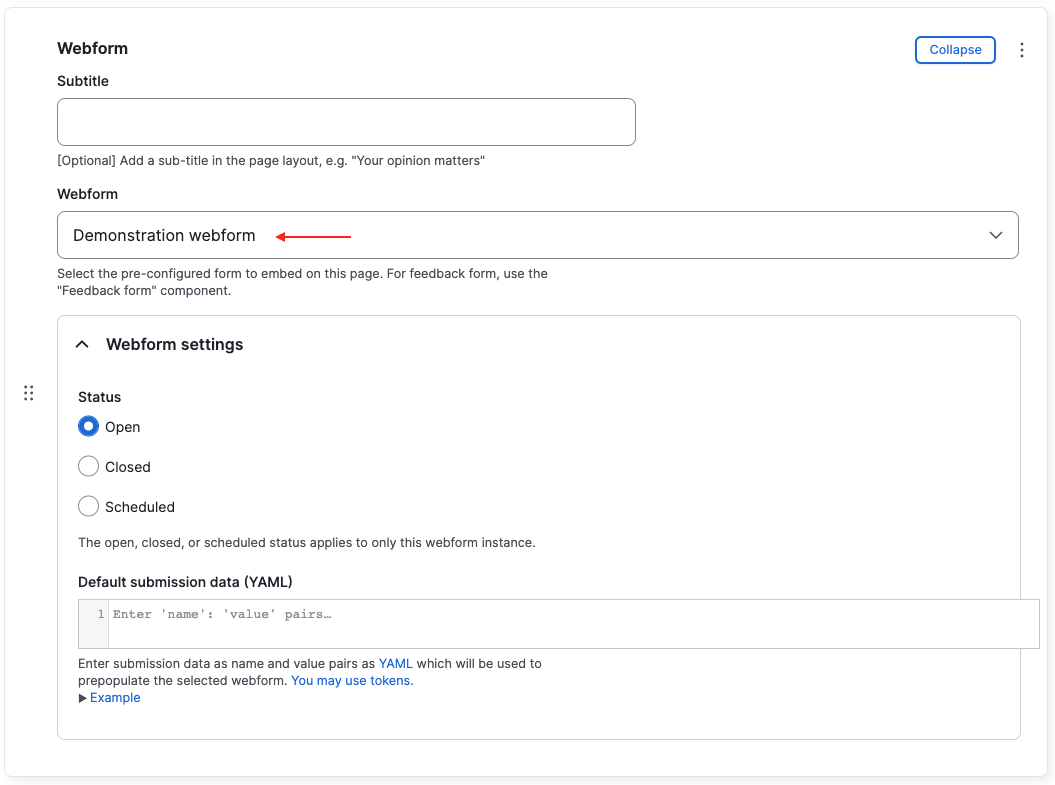
Use the Webform component to add your webform to a specific page.
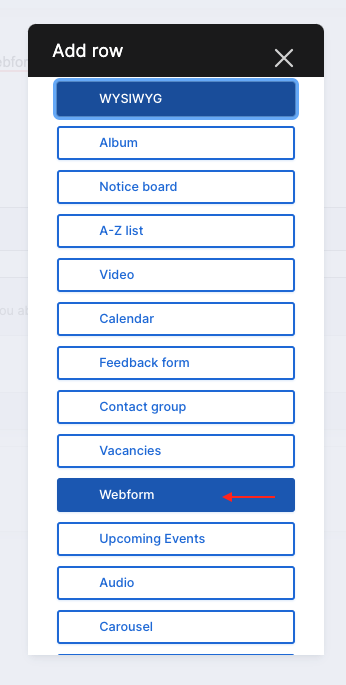
Select your webform from the drop-down select within the component and save your changes to page.
Below is the webform we've put together.