There are two commonly used Email Handler setups. One for notifying you or someone that a submission has happened via email, we'll call this the notification email, and two notifying the person who has submitted the form that their submission was received, we'll call this the confirmation email.
Adding an Email handler
To add an Email handler, you will need to edit your Webform and navigate to the Emails / Handlers tab under the Settings tab.

Click the Add email button in the top right.
A side bar section should appear, where you will fill in your Email handler settings. See instruction below to continue with setting up a Notification email.
Notification email setup
You will need to update the following settings to set a basic notification email.
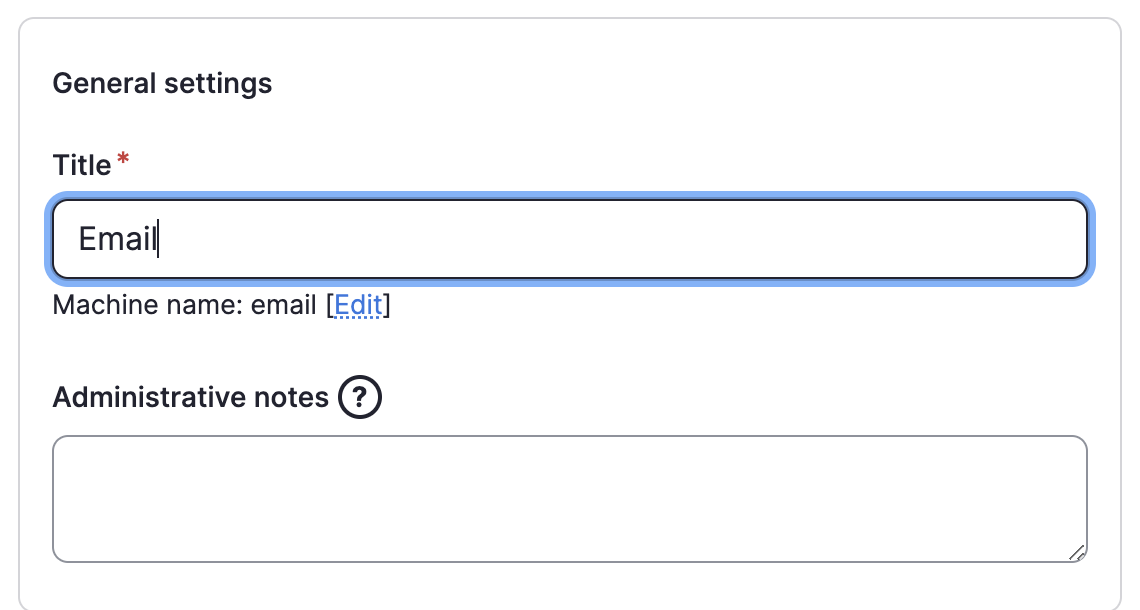
Update the Title field to Notification Email, under General settings

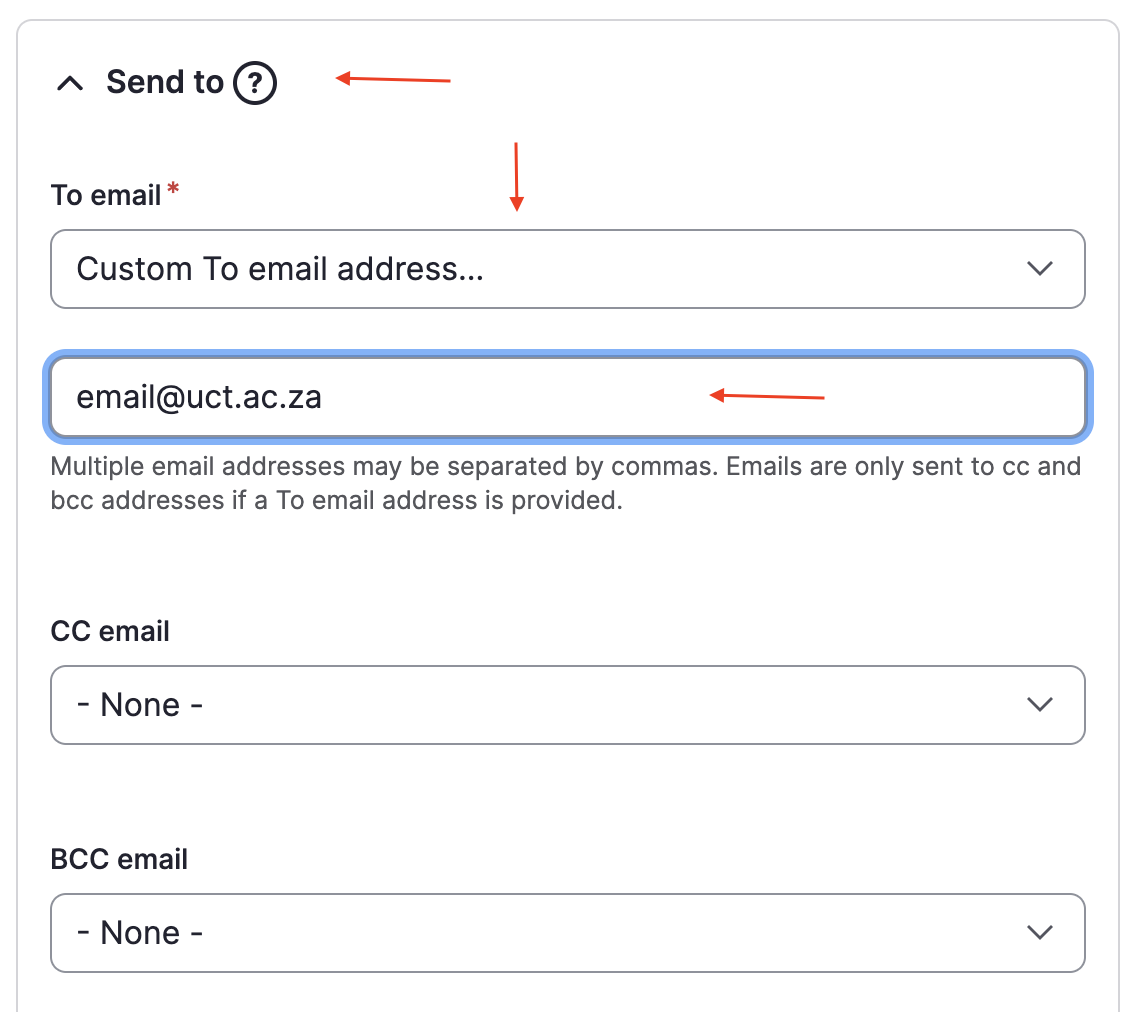
Within the Send to accordion update theTo email drop down
Select Custom To email address... from the drop down.
Add your email address in the field that appears below the drop down once you've selected the option Custom To email address...
You can add multiple email addresses by separating them by a comma, e.g. email@uct.ac.za,example@uct.ac.za

The rest of the settings can be left as is.
At the bottom of the Email handler settings there is a Save button click that once done to save your changes for this Email handler.
Once saved, an Email handler will be added or the existing one will be updated. The Email handler will be listed on the Emails / Handlers tab of that Webform if you need to edit it later.
